Installation & Setup
How to get Intranet Design 2 — Clean and Minimal SharePoint Intranet onto your tenant and run the setup wizard for the first time.
⚙️ Installation Instructions🔗
- Upload the
spd-intranetdesign2.sppkgfile to your App Catalog - Navigate to your modern SharePoint site.
- Click the Settings (gear) icon → Select “Add an app”
- Choose Intranet Design 2 — Clean and Minimal SharePoint Intranet
- Click Add
- After installation, go to Site Contents to confirm it's added to the site.
🧪 Free Trial setup Instruction 🔗
🧪 Steps to Set Up and Apply Template🔗
Follow the steps below to configure your SharePoint site using the setup wizard:
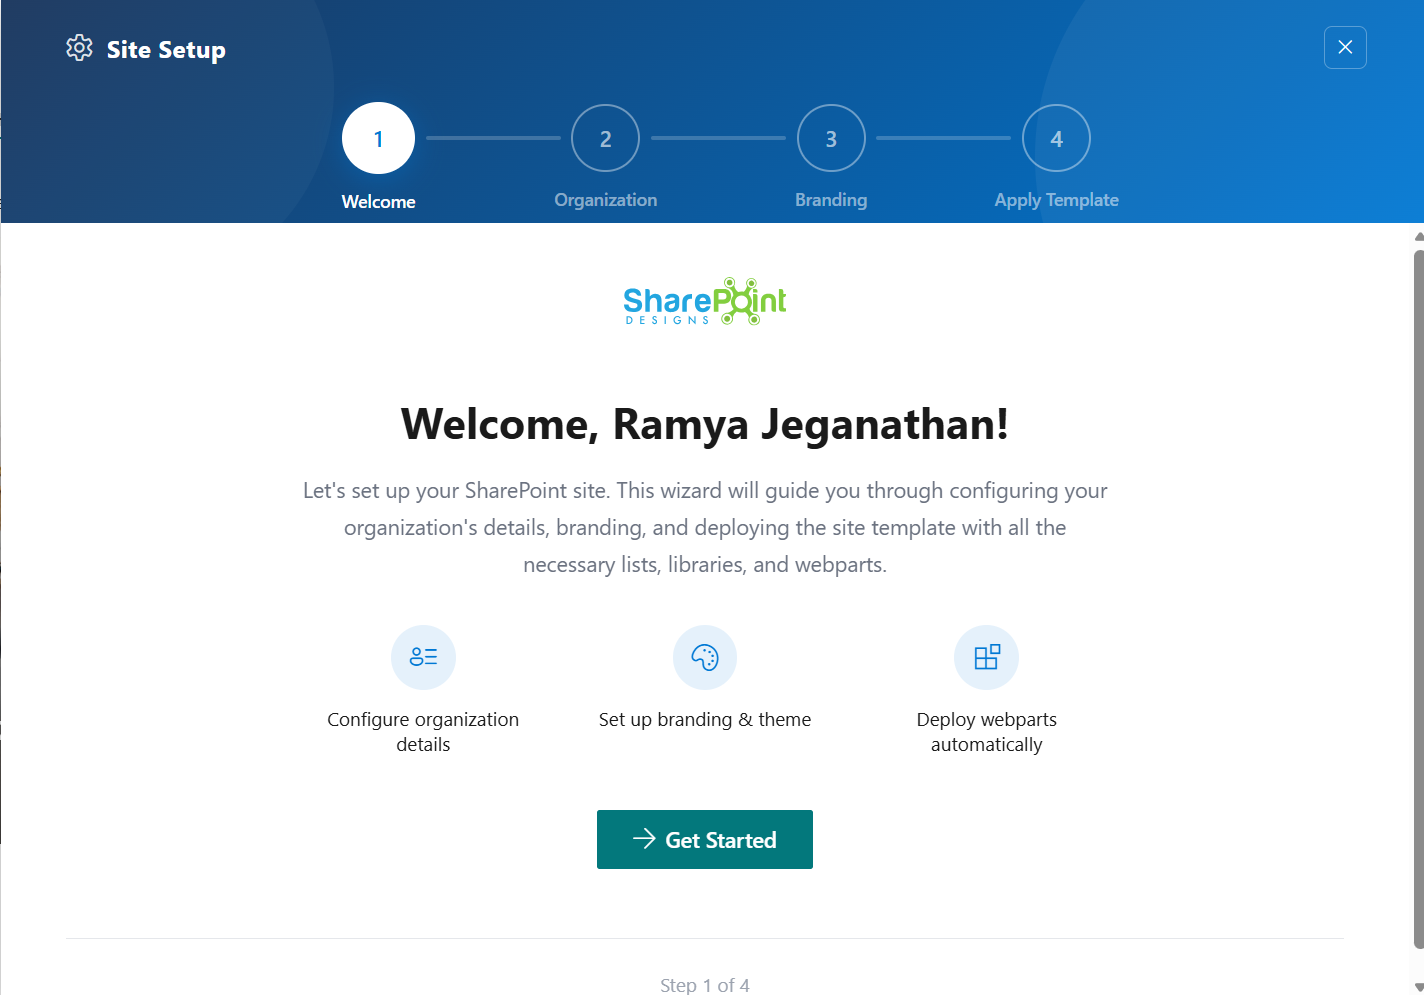
🔹 Step 1: Welcome Screen
- 1Open the Site Setup panel from the top suite bar.
- 2You will land on the Welcome screen.
- 3This screen provides an overview of what will be configured:- Organization details - Branding and theme - Automatic deployment of web parts
- 4Click Get Started to proceed.
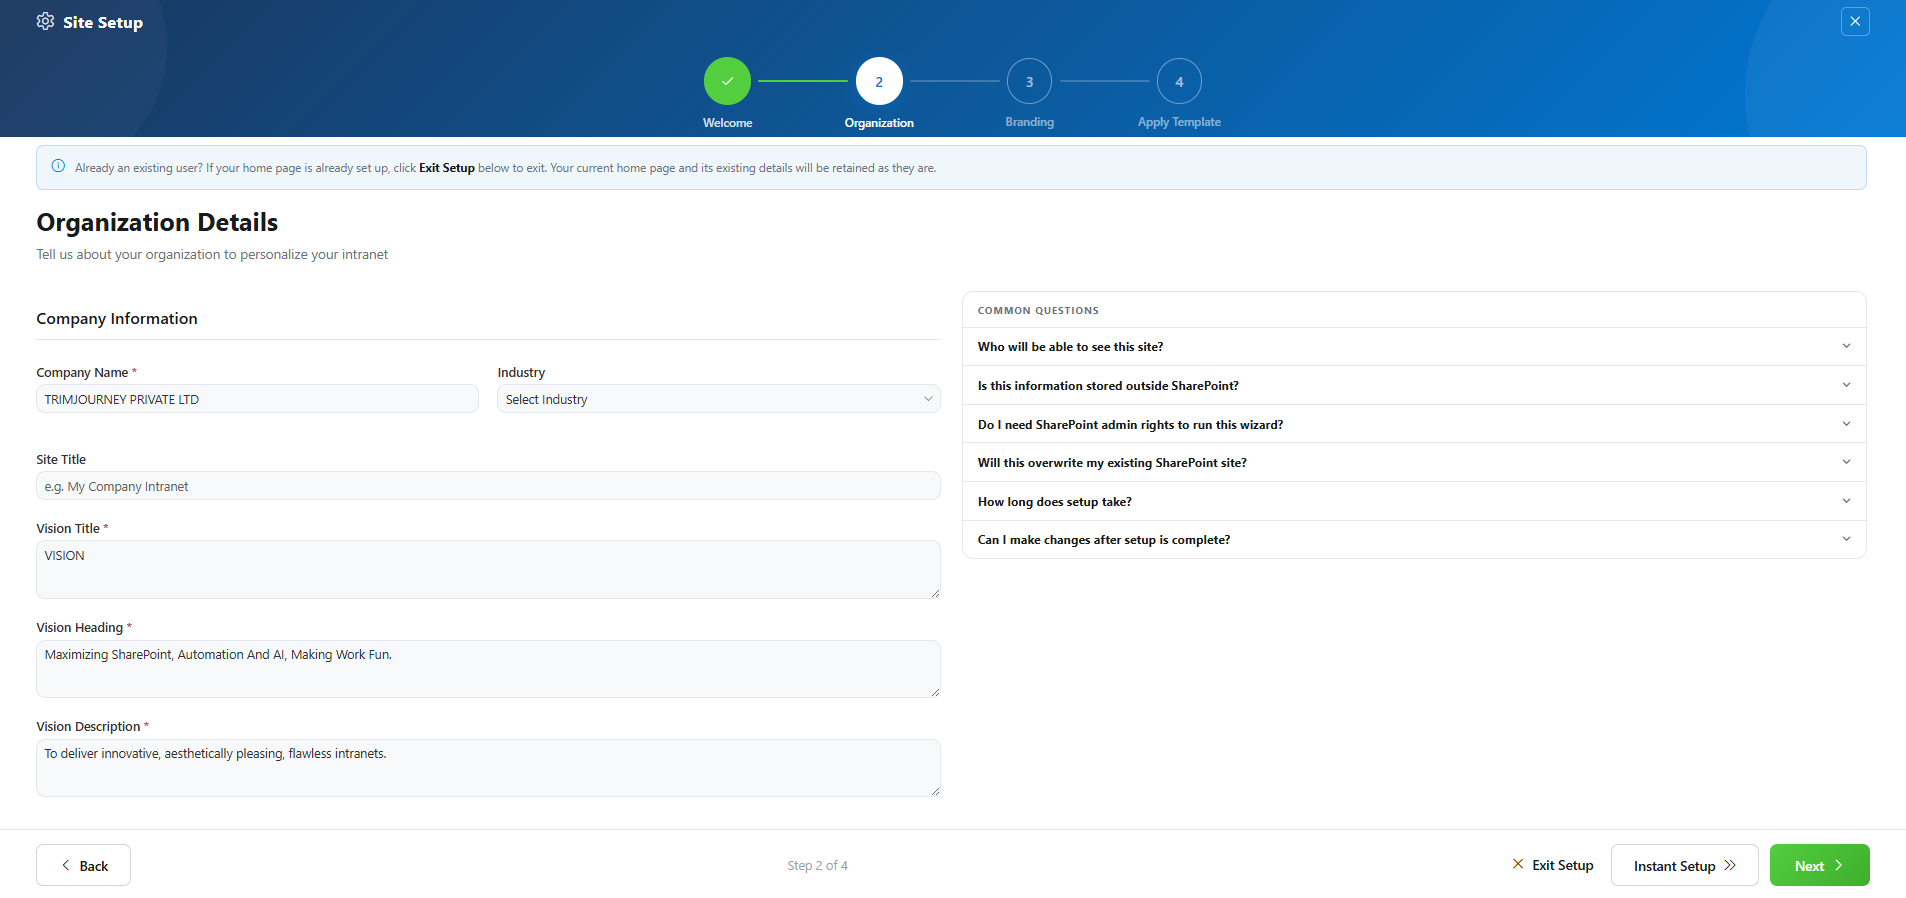
🔹 Step 2: Organization Details
- 1Enter the required Contact Information:- First Name - Last Name
- 2Fill in Company Information:- Company Name - Industry - Number of Employees
- 3Provide additional details:- Vision - Mission
- 4Click Next to continue.
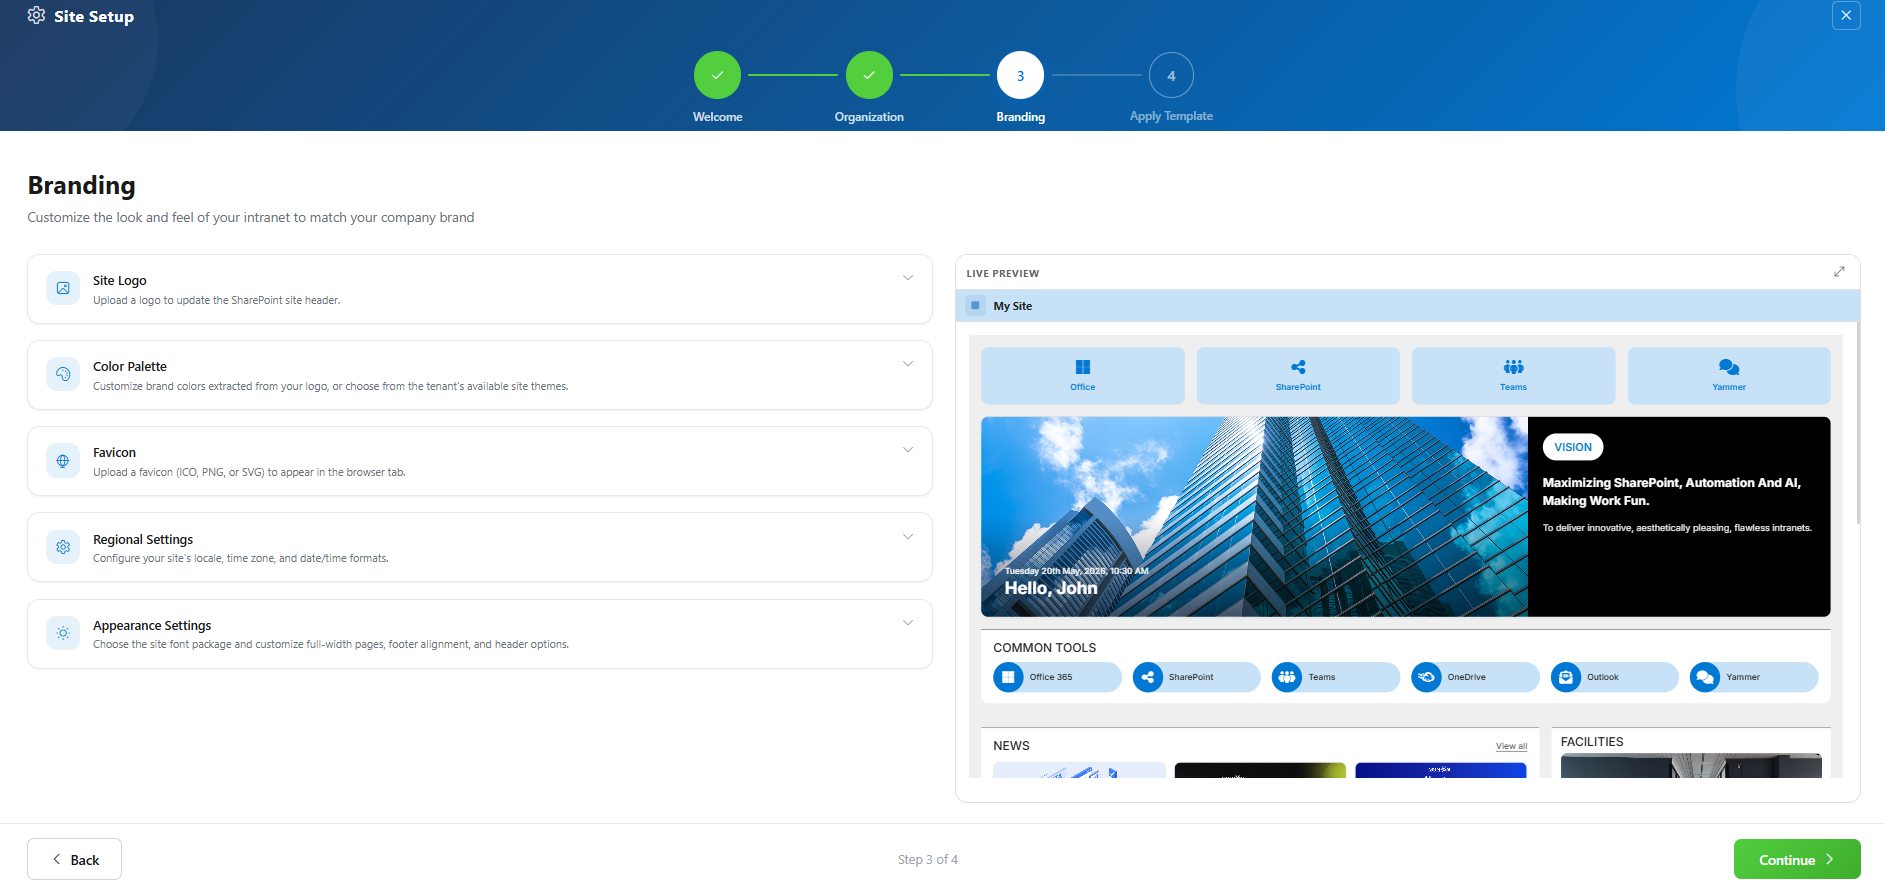
🔹 Step 3: Branding
- 1Upload your Site Logo — Click Upload Site Logo under Site Logo and Theming. Brand colors are automatically extracted from your logo.
- 2Review & adjust theme colors — Edit the extracted primary and secondary colors in the color palette (use the hex fields or color picker), name your theme, then click Apply Theme — or pick an existing theme from Available Site Themes.
- 3 Upload your Favicon — Under Site Favicon, click Upload Favicon to set the icon shown in the browser tab.
- 4 Configure Regional Settings (optional) — Under Regional Settings, click Open Regional Settings to set time zone, locale, and working hours.
- 5 Adjust Appearance Settings (optional) — Under Appearance Settings, fine-tune: Hide Tenant Logo, Hide Site Logo, Hide Site Title, Header Color, Web Part Spacing, Full-Width Page, Footer Alignment, Border Radius, and Font (open Brand Center to manage font packages).
- 6 Preview & continue — Check the Live Preview on the right, then click Continue to move to the next step.
🔹 Step 4: Review Configuration
- 1Review all the configured details:- Organization Details - Branding Settings
- 2Check the What will be created section:- SharePoint Lists - Document Libraries - Home Page - Branding Assets
- 3Click Apply Template to start the setup process.
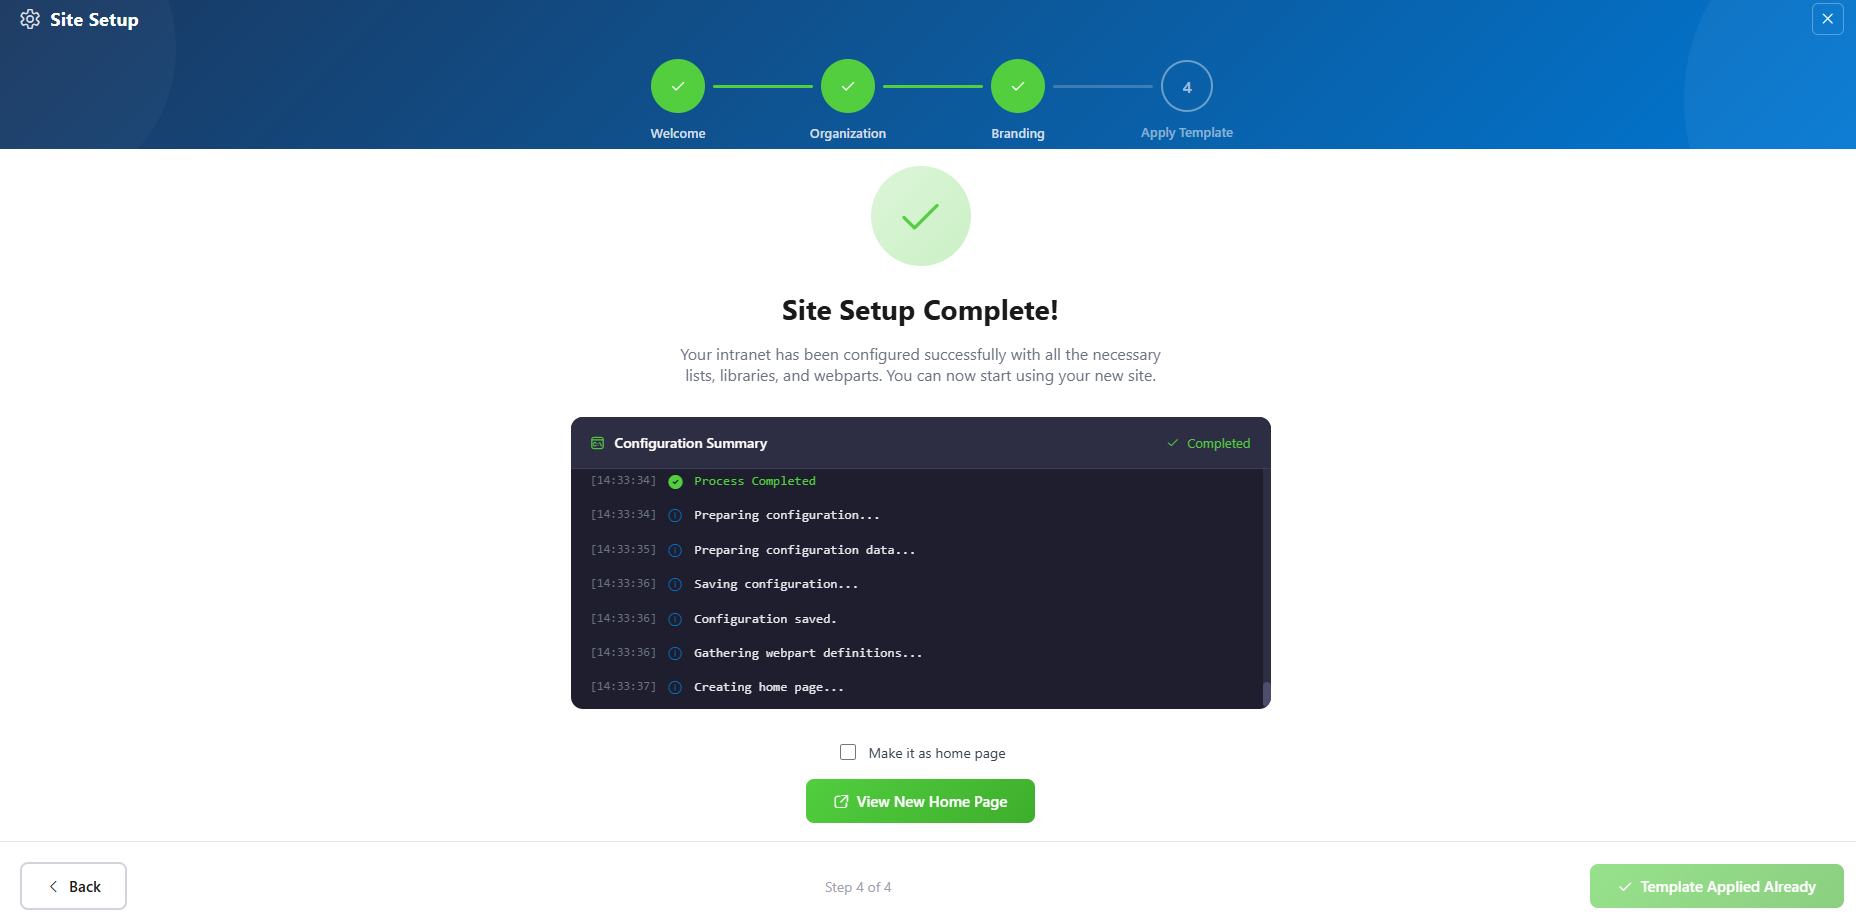
🔹 Step 5: Setup Completion
- 1The system will begin configuring your site and display a Configuration Summary.
- 2You can track:- List creation progress - Library setup - Web part deployment
- 3Once completed, a success message will appear: “Site Setup Complete!”
- 4Click View New Home Page to open your newly created site.
✅ Expected Behaviour
The following SharePoint Lists are automatically created based on the Home Page:
- Top Navigation
- CommonTools
- Facilities
- Holidays
These lists are pre-filled with demo/mock items for easy testing. No manual configuration required after clicking the Apply template button.
Adding web parts manually🔗
You don't have to use the wizard to use the web parts — each one can be added to any page like any other SharePoint web part.
- 1Edit the page and select + to add a web part.
- 2Search for the web part by name (Top Navigation, CommonTools, Facilities, Holidays, Welcome Banner , News, Events Calendar ).
- 3Add it, then open its property pane to configure it — see the Web Parts Reference for every field.
Reopening the wizard later🔗
The Site Setup Wizard launcher button stays available in the page header after setup completes, so you can reopen it any time to update branding — for example, to swap the logo or theme colors.
🧹 Uninstall Guide🔗
Follow the steps below to uninstall the Intranet Design 2 — Clean and Minimal SharePoint Intranet
app from your SharePoint site:
- 1Go to your SharePoint site and click on Site Contents from the left side navigation or the settings menu.
- 2Find Intranet Design 2 — Clean and Minimal SharePoint Intranet in the list of installed apps.
- 3Click the three dots (···) next to the app name and select "Remove".
- 4If prompted to switch to the Classic Experience, follow the prompt to proceed.
5. In the Classic Experience, hover over the app again, click the three dots (···), and then click Remove to finalize the uninstallation.
🛠️ Troubleshooting Common Issues🔗
⚠️ Issue: Web Part Not Displaying Correctly
Solution: Ensure that the web part has been added to a modern SharePoint page and that the page has been republished. Check for any missing permissions that might be required for the web part to function correctly.
🗃️ Issue: Lists/Library Not Created
Solution: Verify that the "Apply template" button was clicked after adding the "Design 2 Setup" web part. If the lists/Library are still not created, delete the page and reapply the design.
📝 Issue: Missing Demo Items
Solution: Check if the lists items are present in the Site Contents. If the lists are empty, manually add demo items or reapply the design.
🌟 Best Practices🔗
🔁 Regular Updates
- Keep Content Fresh: Regularly update the content on your SharePoint site to keep it relevant and engaging.
- Monitor Performance: Regularly check the performance of your SharePoint site and make necessary adjustments to improve speed and user experience.
🎓 User Training
- Provide Training: Offer training sessions for users to help them understand how to use the SharePoint site effectively.
- Create Documentation: Develop comprehensive documentation to guide users on how to navigate and use the site.
🔐 Security Measures
- Implement Security Protocols: Ensure that proper security measures are in place to protect sensitive information.
- Regular Audits: Conduct regular security audits to identify and address potential vulnerabilities.
🗣️ User Feedback
- Collect Feedback: Regularly collect feedback from users to understand their needs and improve the site accordingly.
- Act on Feedback: Implement changes based on user feedback to enhance the overall user experience.
🤝 Collaboration
- Encourage Collaboration: Promote collaboration among team members by providing tools and features that facilitate communication and teamwork.
- Use SharePoint Features: Utilize SharePoint features such as document libraries, lists, and workflows to streamline collaboration and improve productivity.
🧑💼 User Permissions🔗
Stick to the least privilege principle. Review permissions regularly.
📦 Update Package🔗
For instructions on updating SharePoint packages: 👉 View Update Guide
🆘 Support🔗
For help or inquiries, contact SharePoint Designs: 🌐 www.sharepointdesigns.com 📧 support@sharepointdesigns.com